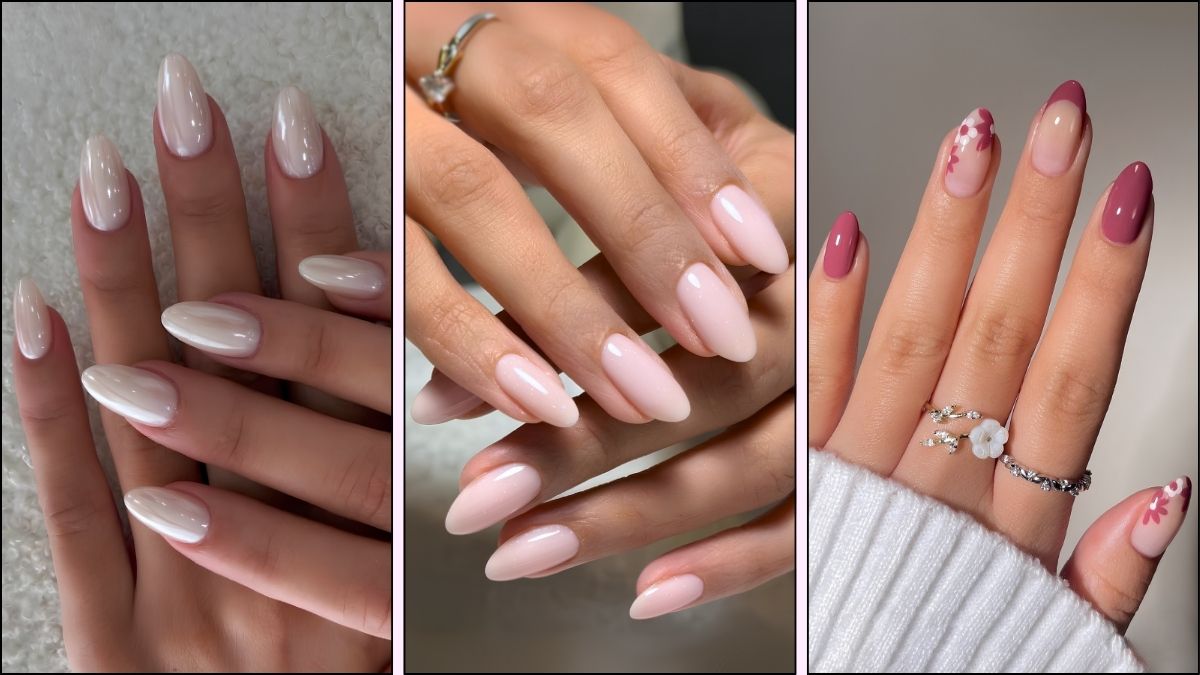
Almond-shaped nails have become a timeless symbol of elegance and sophistication in the world of beauty. This flattering shape, which tapers to a rounded point resembling its namesake nut, elongates the fingers and suits almost every hand. While it looks intricate, achieving and maintaining this chic style is entirely possible, whether you’re a salon regular or a DIY enthusiast. This guide will walk you through the entire process, from creation to care, ensuring you can flaunt perfect almond nails.
The Step-by-Step Creation Process
Creating the perfect almond shape is a process of careful refinement. Patience is your best tool.
Step 1: The Foundation – Nail Prep
Begin with clean, product-free nails. Gently push back your cuticles and remove any existing polish. This step is non-negotiable; a clean canvas ensures everything that follows adheres properly and lasts longer.
Step 2: Achieving the Ideal Length
Almond nails require a bit of length to be executed correctly. Your free edge (the white part of the nail) should extend well past your fingertip. If your natural nails are short, you can use gel or acrylic extensions to build the necessary length. File all nails to a uniform, medium-long length, creating a squared-off tip as your starting point.
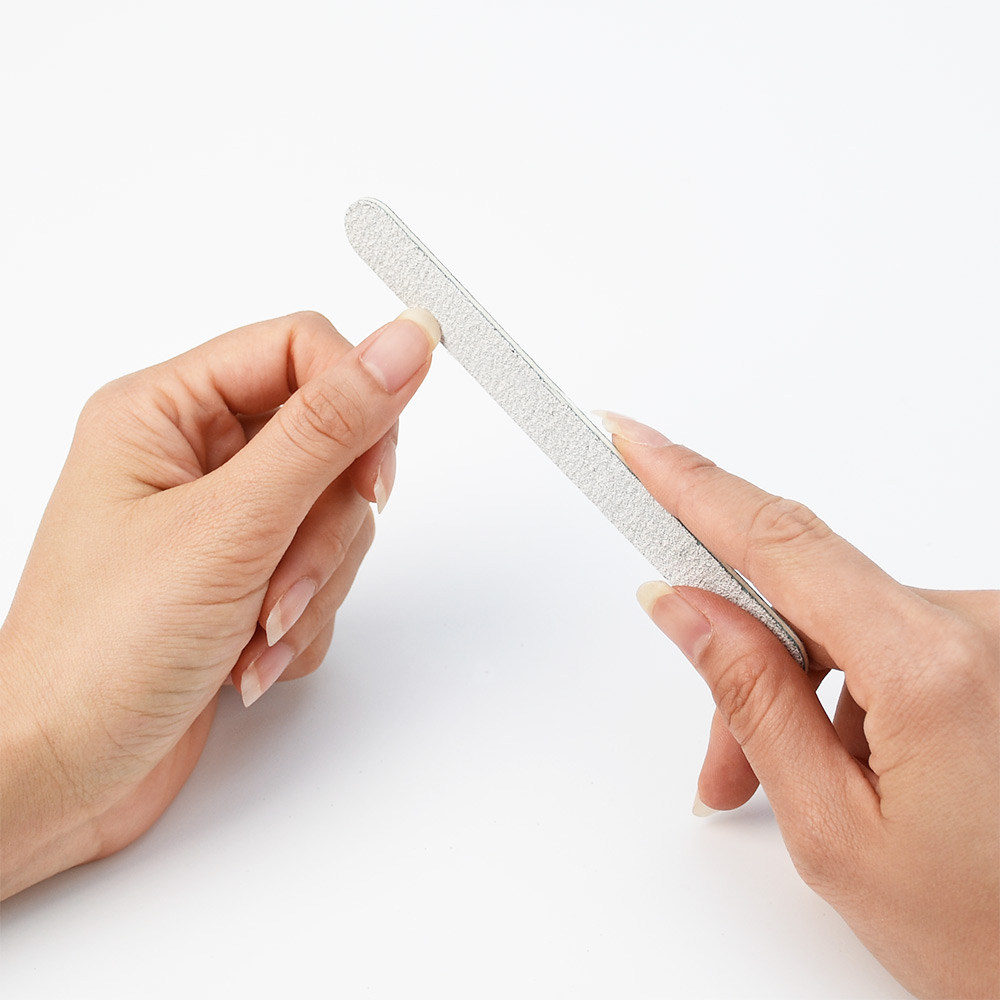
Step 3: The Art of Shaping – Filing the Sides
This is the most critical step. Using a 180-grit nail file, focus on the two corners of your squared-off tip. You will file these corners inwards at a 45-degree angle towards the center of the nail. Do not file the sides of your nail plate straight down, as this will weaken the nail. The goal is to create two gentle slopes that start from the sides of the nail bed and meet in the middle.
Step 4: Creating the Point – Rounding the Tip
Once the sides are tapered, you’ll have a rough, pointed tip. Now, take your file and gently round off that sharp point into a soft, smooth curve. The final shape should be a symmetrical, tapered oval that comes to a delicate, rounded point—not a sharp, dramatic stiletto.
Step 5: Smoothing and Buffing
Use a finer grit nail buffer (around 240-grit) to smooth out any rough edges left by the filing process. This creates a seamless transition from the nail bed to the tip and ensures your polish application will be flawless.
Step 6: Polish and Perfect
Apply a base coat, two layers of your chosen color, and always seal the look with a high-quality top coat. For a truly professional finish, run the tip of the brush along the very end of the nail to “cap” the tip, preventing premature chipping.
Common Pitfalls to Avoid
- Filing Too Far Down the Sides: This is the biggest mistake. Filing into the sidewalls of the nail weakens its structure dramatically, leading to breaks and pain. Only file the free edge, not the nail attached to your skin.
- Creating an Uneven Shape: An asymmetrical almond nail is very noticeable. Frequently step back and look at your nails from different angles to ensure both slopes are even and the point is centered.
- Going Too Sharp, Too Soon: If you try to create a sharp point immediately, you risk making the nail weak and prone to snapping. Always build the shape gradually.
- Skipping the Base and Top Coat: These products are not optional. A base coat protects your natural nail from staining, while a top coat adds strength and a stunning shine, significantly extending the life of your manicure.
Maintaining Your Masterpiece
Almond nails require a little upkeep to stay beautiful.
1. Regular Oil Treatments: Hydration is key. Apply cuticle oil or jojoba oil at least twice a day. This keeps the nail flexible and the surrounding skin healthy, preventing splits and breaks.
2. Be Mindful with Your Hands: Treat your nails as accessories, not tools. Use the pads of your fingers instead of your nails for tasks like typing, typing, or opening cans.
3. Fill, Don’t Remove: If you have enhancements like gel or acrylic, get them filled every 2-3 weeks instead of soaking them off and reapplying. This maintains the strength and integrity of the nail structure.
4. Address Chips Immediately: A small chip can quickly turn into a large crack. If you notice a chip, gently file it smooth to prevent it from traveling up the nail.
Pro Tips for an At-Home Manicure
You don’t need a professional license to achieve salon-quality results at home.
- Invest in Good Tools: A crystal or glass file is gentler on the nails than a coarse emery board. A fine, angled brush is perfect for clean-up around the cuticles.
- Work in Good Lighting: Natural light or a bright LED lamp is essential for spotting imperfections and ensuring a precise application.
- The Clean-Up Trick: Dip a small brush into acetone and carefully trace around your cuticles and skin to clean up any polish mistakes. This single step elevates your manicure from messy to magnificent.
- The Cold Water Plunge: After applying your top coat, submerge your nails in a bowl of ice-cold water for 1-2 minutes. This helps set the polish quickly for a super-shiny, hard finish.
Almond-shaped nails are a beautiful and achievable goal. With the right technique, a mindful approach to maintenance, and a little practice, you can master this elegant shape and enjoy strong, gorgeous nails that make a statement.
Read also: How to Make Gel Nail Reconstruction Last?